Download Building a Pop-up Style Broadcast Opener in CINEMA 4D and After Effects course
Link download Building a Pop-up Style Broadcast Opener in CINEMA 4D and After Effects videos course
Download Building a Pop-up Style Broadcast Opener in CINEMA 4D and After Effects course
Descriptions: In this course, you’ll animate a broadcast opener from scratch, building skills in motion graphics, rendering, and compositing.
Usually, a variety of skillsets and software are needed to bring an animator’s 3D motion-graphics project from start to finish. In this course, Building a Pop-Up Style Broadcast Opener in CINEMA 4D and After Effects, you will develop many important animation skills using multiple kinds of software, all while working on a single project: a movie-themed motion graphics opener in a pop-up style.
You’ll work with CINEMA 4D’s great modeling tools and learn how to set up different kinds of cameras.
Next, you’ll add animation to your vignettes by creating pop-up effects to keep them alive and moving, afterwards moving onto lighting, rendering, and compositing your project.
Finally, you’ll import your composite to After Effects, where you’ll add finishing touches and create a logo for the closing shot.
By the end of this course, you’ll have created a high-quality motion-graphics opener from scratch and developed the many skills you need to succeed at every stage of your future animation projects.
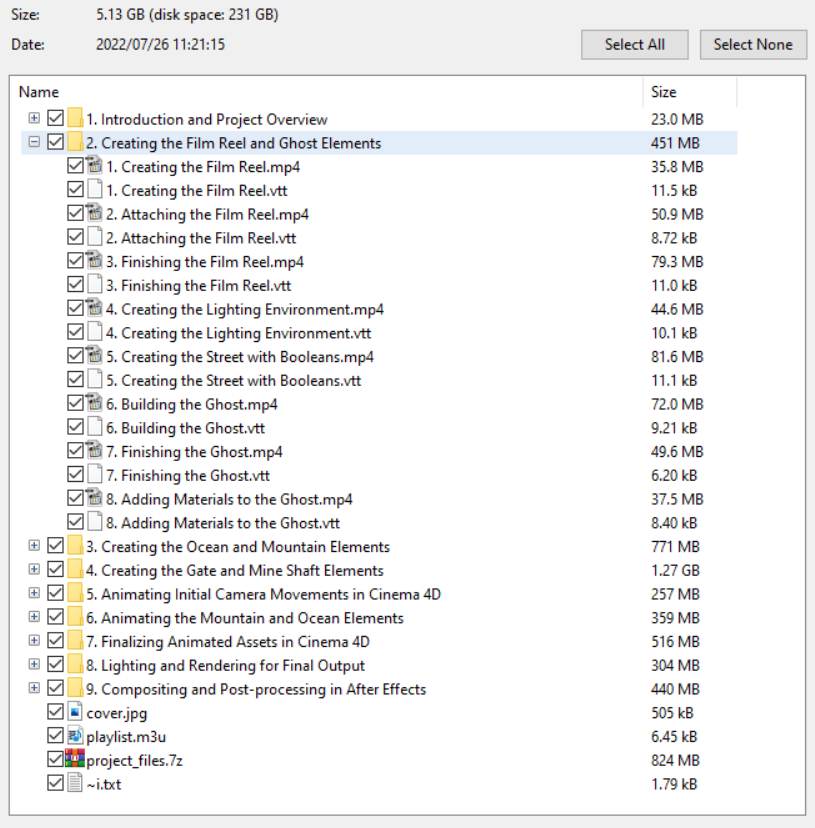
Contents
1. Introduction and Project Overview
1. Introduction and Project Overview
2. Creating the Film Reel and Ghost Elements
1. Creating the Film Reel
2. Attaching the Film Reel
3. Finishing the Film Reel
4. Creating the Lighting Environment
5. Creating the Street with Booleans
6. Building the Ghost
7. Finishing the Ghost
8. Adding Materials to the Ghost
3. Creating the Ocean and Mountain Elements
01. Modeling the Beach
02. Modeling a Buoy
03. Building a Shark Fin
04. Modeling the Billboard
05. Finishing the Billboard
06. Modeling the Mountain
07. Adding Materials to the Mountain
08. Adding Trees with Cloners
09. Randomizing Tree Colors
10. Building the Spaceship
11. Finishing the Spaceship
12. Adding a Crowd of People
4. Creating the Gate and Mine Shaft Elements
01. Creating the Gate
02. Building the Sign with Splines
03. Modeling the Doors
04. Adding Materials to the Gate
05. Adding Ferns with Cloners
06. Adding Palm Trees
07. Modeling the Large Cliff
08. Adding Materials to the Cliff
09. Modeling the Mine Track
10. Finishing the Mine Track
11. Modeling the Scaffolding
12. Building the Mine Cart
13. Modeling Cart Occupants
14. Finishing the Occupants
15. Attaching the Mine Cart to a Path
16. Creating Arrows
17. Setting up for Transition Foliage
18. Creating Transition Grass
19. Creating Transition Trees
20. Creating Transition Ferns
5. Animating Initial Camera Movements in Cinema 4D
1. Setting up the Cameras, Targets, and Tags
2. Animating the Main Shot Camera and Target
3. Animating Camera Two for the Wide Shot
4. Creating a Morph Camera and Animating the Blend
5. Baking the Morph Camera
6. Animating the Mountain and Ocean Elements
1. Animating Devils Tower
2. Animating the Spaceship
3. Animating the Crowd
4. Animating the Beach Appearing
5. Animating the Buoy and Water
6. Animating the Billboard Transition
7. Animating the Transition Grass
7. Finalizing Animated Assets in Cinema 4D
01. Animating the Road
02. Animating the Ghost Appearing
03. Animating the Ghost Walk Cycle
04. Animating the Gate
05. Adding the Torches
06. Animating the Sconces
07. Animating the Foliage
08. Animating the Cliff
09. Animating the Mine Carts
10. Animating the Arrows
8. Lighting and Rendering for Final Output
1. Adding the Lighting and Sky to the Shot.
2. Setting up for Depth of Field
3. Fixing the Target Path to Get a Better Focus Object
4. Setting up the Render Settings and Testing
9. Compositing and Post-processing in After Effects
01. Importing the Rendered Passes to After Effects
02. Using RSMB Pro (Reel Smart Motion Blur) with the Motion Vector Pass
03. Using the Frischluft Lenscare Plugin for Realistic Depth of Field
04. Adding Glow Using the Object Buffers
05. Adding Placeholder Lights to the CINEMA 4D File
06. Using Knoll Light Factory to Add Flares to Our Extracted Lights
07. Assigning the Proper Hierarchy to the Light in CINEMA 4D
08. Animating the Hand-drawn Logo
09. Revealing the Letters with a Mask
10. Adding a Gradient Fill to the Shape Layer for the Film Strips
11. Adding Realistic Lens Effects to the Composition
12. Cleaning up Issues
For download this video training course (Building a Pop-up Style Broadcast Opener in CINEMA 4D and After Effects), please click to download sysmbol and complete your checkout to support a little bit to help my website is maintained. The download link will be appeared automatically after you complete your payment.

After you receive *.zip file, open it and open *.txt instruction’s file to see video for download instruction if you don’t know how to download.
All make sure you’ll get best services and we’ll help you any time when you get any problems. Don’t mind to contact admin: [email protected].
p/s: You also can request somethings which don’t have inside this website, we’ll try our best to them it for you.
Thank you.
